How do I import my recipients from WordPress / WooCommerce?
Updated on April 21, 2025
1 - Get a WooCommerce API Key
In order for OxiMailing to connect to your site, you need to authorize it. To do this, you will need to create an API key in your administration interface.
Here’s how it works:
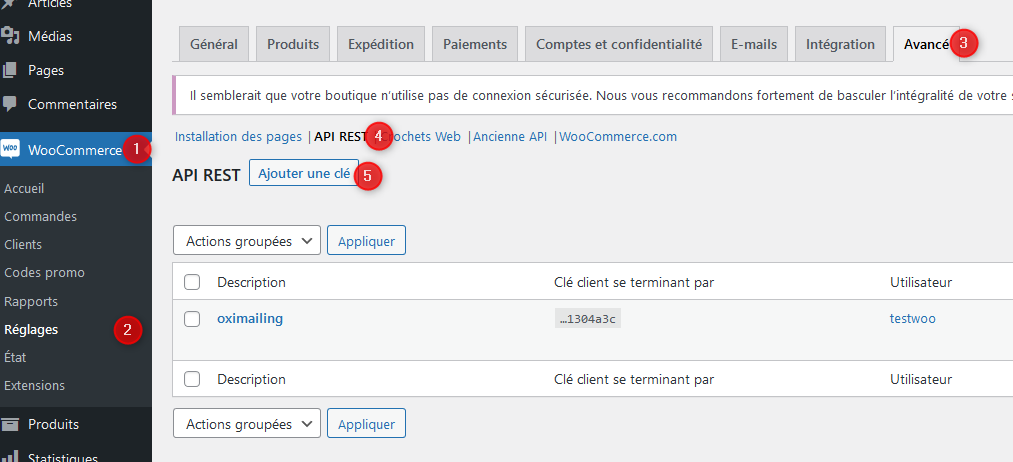
You will be prompted to give a name to your key (put “OxiMailing” for example) and give an access level (read is sufficient).
Your key will then be generated (it is actually a pair of keys):

Note down this information carefully, you will need it later.
💡NB: If you need to find them again, do not recreate a new key, go back to the same WooCommerce menu and, below the “OxiMailing” key, choose “view / edit”.*
2 - Connect OxiMailing to WordPress WooCommerce
Armed with the two keys, all you have to do now is go to OxiMailing and click on “Import” in the list of recipients.
The “WooCommerce” connector is clearly visible:
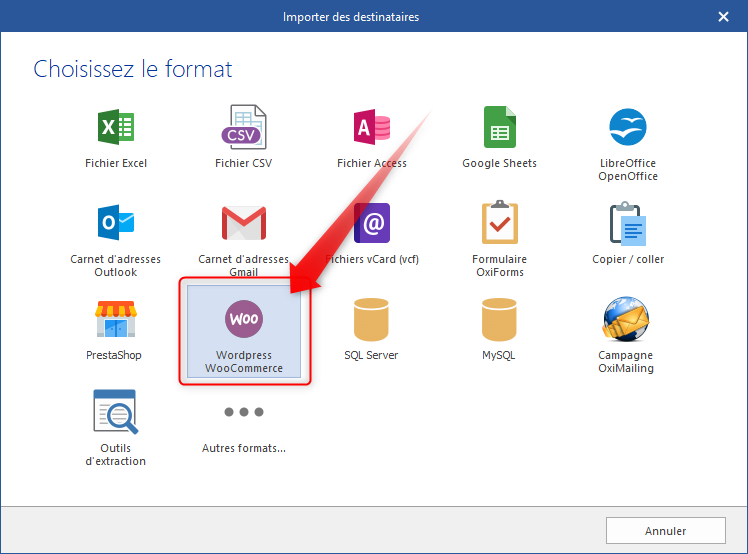
Select it and enter the requested information:
-
Your site’s address in the form “https://www.yoursite.com/”
-
The API key (Consumer Key) from the above step (it normally starts with “ck” - Consumer Key)
-
The Private Key (Consumer Secret) from the above step (it normally starts with “cs” - Consumer Secret)
All you have to do now is validate. The recipients will be imported automatically.
Next time, there is no need to re-enter the information, they are automatically saved.