How to add an expiration date to your messages?
Updated on April 21, 2025
Oxemis has always supported the “Email Expiration Date” initiative led by BadSender and many email industry actors. To further this concept, we have decided to offer the option in OxiMailing starting now.
What is the idea behind this concept?
As stated on the official website:
This project is based on the idea of reducing the carbon footprint of the email marketing sector. While the simplest and most effective methods involve reducing the volume of emails sent and lightening their weight, it is interesting to note that billions of commercial emails are indefinitely stored in data centers around the world. This project aims to reduce the increase in the volume of these stored messages for no reason.
The goal: allowing the sender to specify an expiration date for the emails they send and enabling a recipient (and their operator) to avoid storing messages that are no longer relevant.
Example: a coupon for sales with a limited validity date. Once the date is reached, the email becomes irrelevant, so there is no need to keep it stored in the recipient’s inbox.
How does it work technically?
The concept is simple, the idea is to add a “header” in the message with the name “Expires” followed by an expiration date.
This part is defined in an RFC that can be found here: https://datatracker.ietf.org/doc/html/draft-billon-expires
What are the current limitations?
Support! Indeed, for this concept to be widely accepted, it requires that senders, routers, and email providers implement the solution.
Currently, there is a real consensus on the concept, but debates are still ongoing and the implementation is, for the moment, limited.
In other words, even if you specify an “Email Expiration Date”, it is highly likely that, for now, it may not be supported by your recipients. Nevertheless, we are confident in the future application of this project and we believe it is important for a player like Oxemis to actively engage in this matter.
How does it work in OxiMailing?
As usual, with OxiMailing, it’s very simple!
You go to your message, click on the cogwheel, then “Advanced Settings”. The expiration can be set on the right:
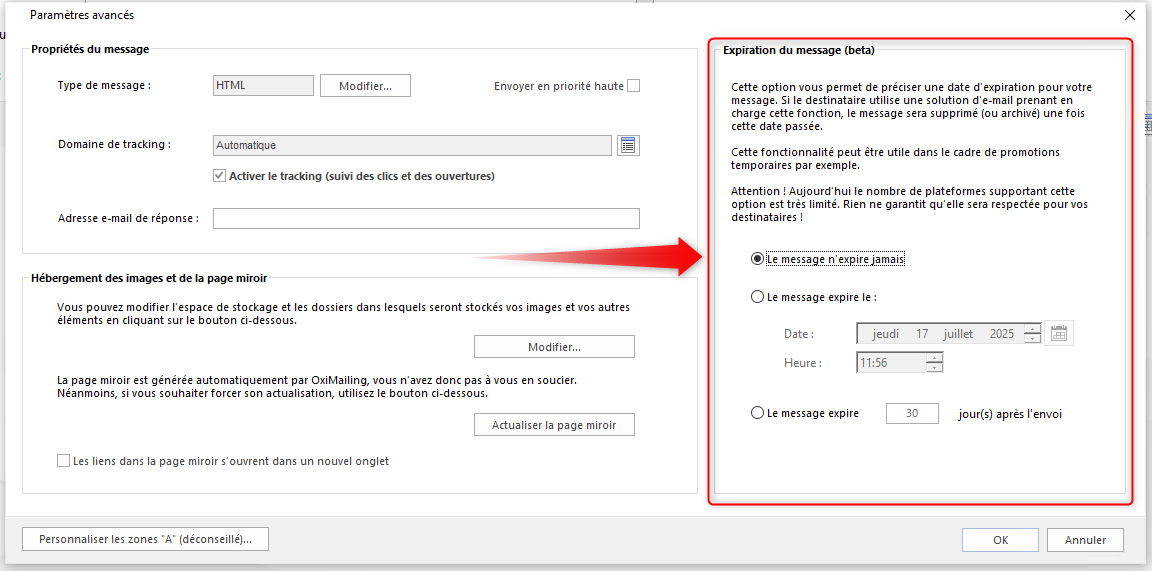
You can choose:
- No expiration
- An expiration on a specific date (necessarily in the future!)
- An expiration on “D+”, in this case, you specify a number of days based on the sending date of your messages (the expiration is therefore dynamic)
Note that to avoid mistakes, the fixed date is never carried over from one campaign to another. If you duplicate a campaign, the only options that will be carried over are “No expiration” or “Expiration on D+”.
Any questions?
Feel free to contact us! And also, please do not hesitate to provide us with feedback on this new feature.