How to add an attachment?
Updated on April 21, 2025
To add an attachment, click on “Message” (on the left) then “Attachments”. Click on the “Add” button to access the attachment addition screen. You can get more options by clicking on the arrow to the right of the button:
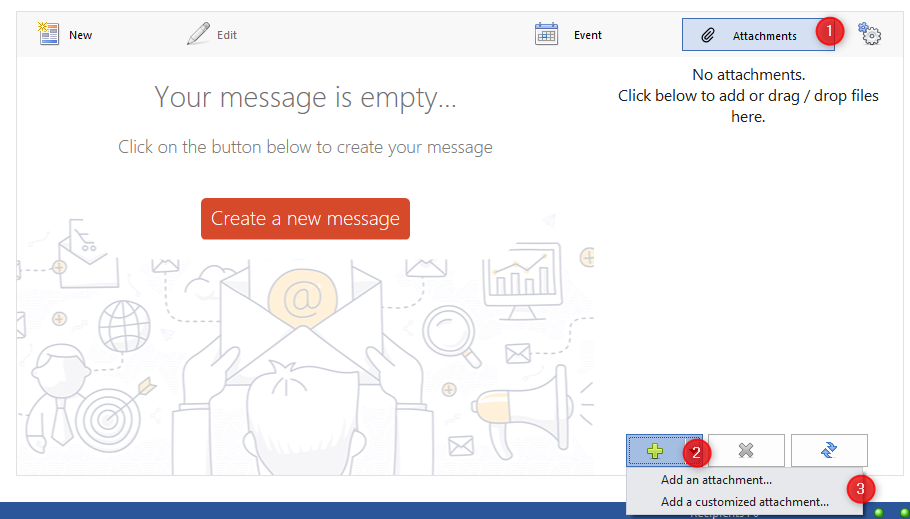
You have two modes of attachment:
- The same file for all recipients
The “classic” attachment mode, you add a file that will be present in all sent emails.
⚠️Attention: do not abuse attachments, the heavier your message, the slower your sending speed, and the more likely your message is to be classified as SPAM. Opt for adding a link rather than an attachment instead: How to send a file to the recipients of my message without attaching it?
- A customized file for each recipient
The principle of adding a customized attachment is as follows: you build the path to the attachment from your address file. For example, let’s say you have the following address file:
| Last Name | First Name | Client Code | |
|---|---|---|---|
| contact@idontknow.com | Chabal | Nicolas | 2584 |
| henri@acompany.com | Deschamps | Henri | 1527 |
| laurent@acompany.com | Lelouant | Laurent | 1525 |
You want to send an attachment for each client (such as a summary of invoices) located in the directory: c:\invoices.
Suppose, for example, that the invoice name (file name) is composed of the client code (found in the address file) followed by the PDF extension (for example 2584.pdf for the first client in the list).
In the “Path” field, you just need to write:
c:\invoices[Client Code].pdf
[Client Code] being replaced by the field value for each recipient, you can see that the attachment path is (for the first recipient):
c:\invoices\2584.pdf